

Oh, Classic French Toast. Just the smell of it takes me back to chilly Saturday mornings, still in my pajamas, the house quiet except for the gentle sizzle from the kitchen. I remember trying to make it for the first time, probably around age ten, after watching my grandma effortlessly flip golden slices. Mine were... less than golden. More like burnt-on-one-side, soggy-on-the-other. Honestly, it was a disaster! But that simple combination of bread, eggs, and a little something sweet? It felt like magic. And it still does. This isn't just breakfast, it’s a warm hug for your soul, a little piece of comfort I love to share.
I once tried to get fancy and use some artisanal sourdough I had lying around for Classic French Toast. Oops! It was way too dense and didn't soak up the custard properly. My husband, bless his heart, tried to pretend it was good, but I could see the struggle. Sometimes, the simplest bread is truly the best. Live and learn, right? Now I stick to what I know works, and it makes all the difference.
Ingredients for Classic French Toast
- Thick-Cut Bread (Challah or Brioche): This is the foundation, hon! Challah or brioche gives you that incredible fluffy, rich texture. Don't use thin white bread, just don't, it'll get soggy. I once tried to use day-old sandwich bread and it just disintegrated in the pan.
- Large Eggs: The binder! They create that lovely eggy crust. I once cracked a double-yolker, and it felt like good luck for the batch. Make sure they're fresh, it really does make a difference in flavor and texture.
- Whole Milk: For a truly rich Classic French Toast, whole milk is where it's at. I tried skim milk once when I was trying to be "healthy," and it just wasn't the same. The richness was gone, and I regretted it instantly.
- Vanilla Extract: Oh, the aroma! A good quality vanilla makes everything better. I always add a generous splash because I love that warm, inviting scent. Store-brand is fine, but I do have a soft spot for Mexican vanilla.
- Ground Cinnamon: This spice is non-negotiable for me. It adds that classic warmth and depth. I sometimes get a little heavy-handed, and honestly, no complaints yet! It just smells like comfort.
- Pinch of Nutmeg: Just a tiny whisper of nutmeg really elevates the cinnamon. It adds a subtle, almost mysterious warmth. Don't go overboard, or it can taste a bit gritty, I learned that after an "oops" moment.
- Granulated Sugar: Just a touch to sweeten the custard and help with browning. I don't add much because I know the syrup will do the heavy lifting later, but it rounds out the flavors.
- Unsalted butter: For cooking! Real butter gives you that beautiful golden crust and a flavor that oil just can't match. I always make sure I have a fresh stick in the fridge for these kinds of recipes.
How to Make Classic French Toast
- Whisk the Custard:
- First things first, let's get that custardy goodness ready! In a shallow dish, crack your eggs. Whisk them well until they're totally combined and a little frothy. Then, pour in the whole milk, vanilla extract, ground cinnamon, nutmeg, and granulated sugar. Whisk it all together until it's super smooth and everything's incorporated. I always make sure there are no streaks of egg white left, that's where I used to mess up and get unevenly cooked toast. You want a uniform, pale yellow mixture. It should smell subtly sweet and spicy already!
- Prepare and Soak the Bread:
- Now for the star of the show: your bread! If you're using day-old bread, that's actually a win, it soaks up the custard better. Take each slice and gently, but thoroughly, dip it into the egg mixture. Let it soak for about 15-20 seconds per side. Don't rush this part! This is where the magic happens, ensuring your Classic French Toast is custardy on the inside, not just on the surface. My big mistake once was not letting it soak long enough, and the center was still dry. We don't want that!
- Heat the Pan:
- While your bread is soaking, get your pan ready. I usually use a large non-stick skillet or a griddle. Place it over medium-low heat. This is crucial you don't want it too hot, or the outside will burn before the inside cooks through. Add a pat of unsalted butter and let it melt, swirling it around to coat the bottom. You should hear a gentle sizzle, and the butter should be fragrant, but not browning too quickly. If it starts smoking, your pan is too hot!
- Cook the First Side of Classic French Toast:
- Carefully transfer your soaked bread slices to the hot, buttered pan. Don't overcrowd it, I usually do two slices at a time, maybe three if my pan is huge. You want enough space between them for even cooking. Let them cook for about 3-4 minutes on the first side. You're looking for a beautiful golden-brown color. The edges should start to firm up, and you'll smell that amazing sweet, eggy aroma filling your kitchen. Resist the urge to peek too early!
- Flip and Cook the Second Side:
- Once that first side is perfectly golden, gently flip each slice using a spatula. This is where I sometimes get a little messy, but hey, that's real cooking! Cook the second side for another 3-4 minutes, until it's also golden brown and the Classic French Toast feels cooked through. If it starts to look dry or the pan gets too hot, add another small pat of butter. You want that even, toasted perfection on both sides. Don't worry if a little bit of custard oozes out, it's all part of the process!
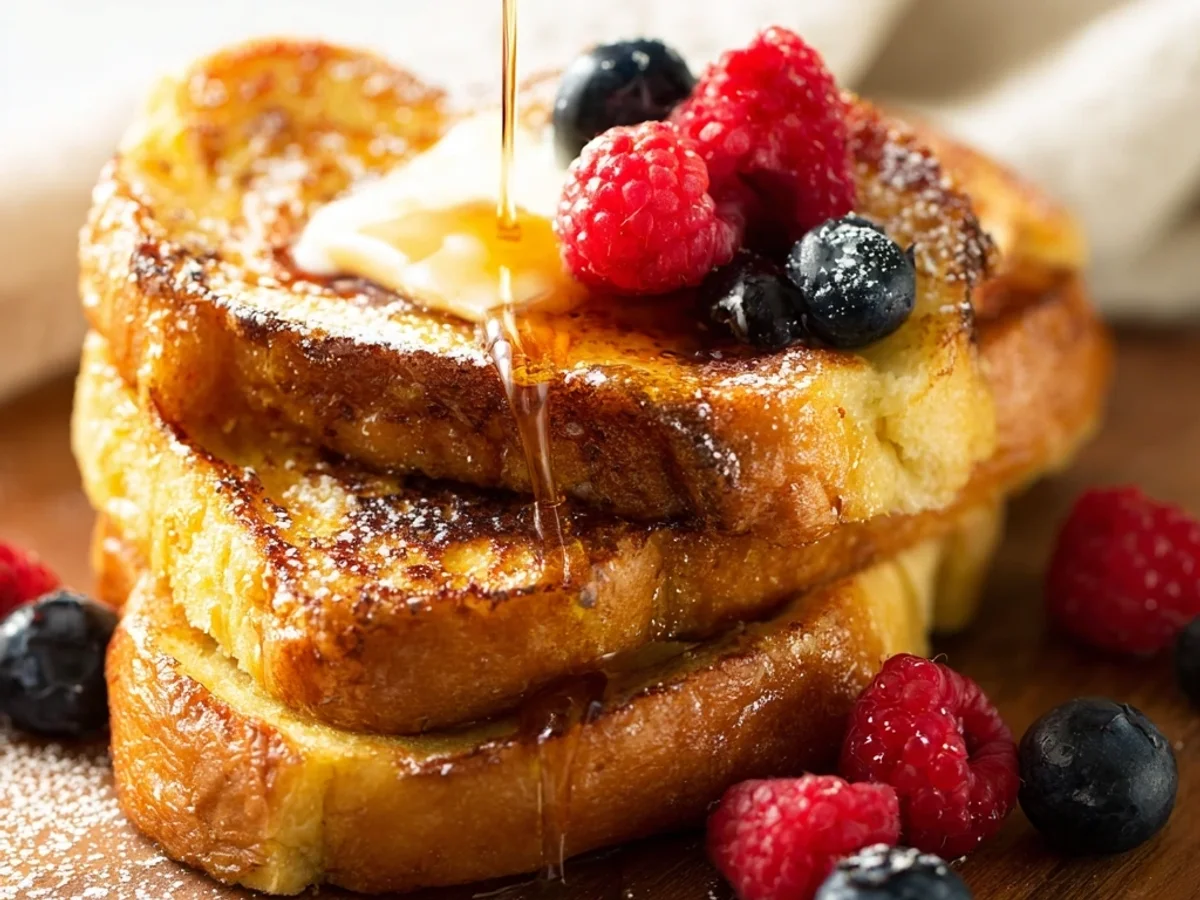
- Serve Your Classic French Toast:
- As soon as they're done, transfer your golden-brown slices of Classic French Toast to a plate. If you’re making a big batch, you can keep them warm in a low oven (around 200°F/95°C) while you cook the rest. I love piling them high and immediately drizzling with warm maple syrup, maybe a dusting of powdered sugar, and a scattering of fresh berries. The steam rising from the stack, the sweet smell... that's the good stuff. Enjoy it while it's hot!
Honestly, there’s something so satisfying about seeing those perfectly golden slices emerge from the pan. One time, my dog, Buster, was so intrigued by the smell, he actually tried to jump up and snatch a piece right off the cooling rack. Of course, he didn't get any, but it just goes to show how irresistible this Classic French Toast is! It always makes me smile, even when my kitchen looks like a flour bomb went off.
Storing Classic French Toast
So, you've made a big batch of Classic French Toast? That's smart! For storage, let any leftover slices cool completely on a wire rack first. This prevents them from getting soggy when you stack them. I usually layer them between sheets of parchment paper and then pop them into an airtight container. They'll keep in the fridge for about 2-3 days. Now, reheating is where I've made some mistakes. I microwaved it once, and the texture was just... rubbery. So don't do that, lol. My personal tip? Reheat them in a toaster oven or even a regular oven at 350°F (175°C) for about 5-10 minutes. They crisp up beautifully, almost like they were freshly made. You can even freeze them for longer storage, up to a month! Just make sure they're fully cooled, then freeze flat on a baking sheet before transferring to a freezer-safe bag. Thaw overnight in the fridge, then reheat as usual.

Classic French Toast Ingredient Swaps
If you're out of a specific ingredient for Classic French Toast, don't panic! I've experimented quite a bit in my kitchen. No whole milk? You can use half-and-half for an even richer custard, or even almond milk for a lighter version, though it won't be quite as decadent. I tried it once when desperate, and it was... acceptable! If you don't have challah or brioche, a good quality Texas toast or even thick-cut white bread (day-old is best!) will work. Just be mindful of how long you soak it. For flavor, if you’re out of cinnamon, a pinch of pumpkin pie spice can give it a lovely autumnal twist. I once used a tiny bit of cardamom, and it was surprisingly delicious, a little exotic! Feel free to play around with extracts too, a drop of almond extract alongside vanilla can be really nice.
Serving Your Classic French Toast
Serving Classic French Toast is where you can really make it your own! Of course, warm maple syrup is a classic for a reason, but don't stop there. I love a dusting of powdered sugar it just makes it look so fancy! Fresh berries are a must for me, especially sliced strawberries or plump blueberries, they add a lovely tartness that cuts through the richness. For a more substantial brunch, I often serve it alongside crispy bacon or savory breakfast sausage. And honestly, this dish and a good rom-com on a rainy Sunday morning? Yes please! A strong cup of coffee or even a mimosa if you're feeling celebratory makes it a truly special meal. Sometimes, I’ll even add a dollop of whipped cream or a drizzle of chocolate sauce for a really decadent treat. It’s all about what makes you happy!
The Story Behind Classic French Toast
The idea behind Classic French Toast, or 'pain perdu' as it's known in France (which literally means 'lost bread'), actually dates back centuries! It was a brilliant way to use up stale bread that would otherwise go to waste. Instead of tossing it, people would soak it in a mixture of milk and eggs, then fry it up, giving it a new, delicious life. I love that resourcefulness! For me, discovering this backstory made me appreciate the dish even more. It’s not just a fancy breakfast, it’s a nod to history, to making something wonderful out of something humble. My own connection to it came from those early morning experiments, turning simple ingredients into something comforting and familiar, a tradition I hope to pass on. It’s a testament to how simple food can hold so much meaning and history, transforming a basic ingredient into a beloved meal.
So there you have it, my take on Classic French Toast. It’s more than just a recipe, it’s a little piece of my kitchen, full of memories, a few minor mishaps, and a whole lot of love. I hope it brings as much joy and comfort to your table as it does to mine. Honestly, it turned out pretty darn good this time, no major kitchen disasters to report! Now, go on, give it a try, and don't forget to tell me how your batch turns out!

Frequently Asked Questions About Classic French Toast
- → Can I make Classic French Toast ahead of time?
You can prep the custard mixture the night before and store it in the fridge. Just whisk it again before dipping the bread. I wouldn't soak the bread too far in advance, though, or it might get too mushy. I learned that the hard way, trying to save five minutes!
- → What kind of bread is best for Classic French Toast?
Thick-cut challah or brioche is truly the dream for Classic French Toast. They're sturdy enough to soak up the custard without falling apart and give a wonderful rich texture. I once tried regular sandwich bread, and it was just too thin and soggy, not ideal.
- → How do I prevent my Classic French Toast from being soggy?
The key to non-soggy Classic French Toast is not over-soaking thin bread and cooking on medium-low heat. Also, make sure your pan isn't overcrowded so steam can escape. I used to rush it and end up with sad, steamed toast, but patience is a virtue here!
- → How long does Classic French Toast last in the fridge?
Cooked Classic French Toast will last 2-3 days in an airtight container in the fridge. Just be sure to cool it completely before storing. I always reheat mine in the toaster oven, microwaving just makes it taste a bit sad and rubbery.
- → Can I use a different kind of milk for Classic French Toast?
Absolutely! While whole milk gives the richest result, you can use 2%, almond milk, or even oat milk. I've tried them all! Just know the flavor and richness might vary a bit. Experiment and see what you like, that's the fun part of cooking!